In 6 steps to correctly adjusted bicycle handlebars

The perfectly adjusted handlebar reduces problems in the back and prevents injuries. A straight back and an optimal riding experience, especially on long tours, are influenced by the handlebar height. The handlebar height depends on the
type of bike and the desired sitting position. With correctly adjusted handlebars, the pelvis tilts slightly forward when sitting and the back forms a slight hollow back.
With sporty mountain bikes or touring bikes, the handlebars should be adjusted lower than the saddle.
This posture can also be found on racing bikes. The more the upper body is inclined, the sportier the riding position. On city bikes and Dutch bikes, you tend to set a straight riding position in order to concentrate your weight on the comfortable saddle. The saddle and handlebars are then about the same height.
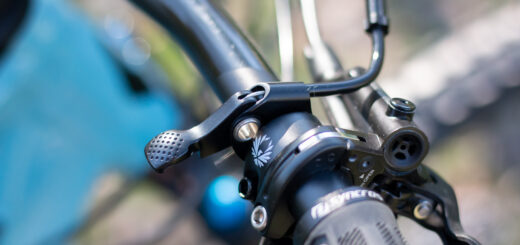
Adjusting handlebar height with an Ahead stem
With the Ahead stem, the handlebars cannot be adjusted themselves. It is mounted directly on the steerer tube and is comparatively light. The handlebars can be raised by placing spacers between the stem and the headset. Since this step is rather unsuitable for beginners, we recommend consulting a specialist.
Distance between bicycle saddle and handlebars
The distance between the bicycle saddle and the handlebars is largely responsible for the seating position. The perfect distance can be determined using a rule of thumb. You can do this by touching the tip of the saddle with your elbow and then stretching your forearm towards the handlebars. If you now touch the handlebars with your outstretched fingers, or only almost, the distance is correct. The shorter the distance, the more upright you sit on the bike. Since the seating position has an extreme effect on the riding behaviour, you should find a position in which you can ride comfortably and save energy.
In 6 steps to the perfectly adjusted handlebar
Remove the protective cap
If present, remove the protective cap on the stem to access the hexagon socket screw.

Loosening the screw
To be able to move the stem, unscrew the screw a little counterclockwise.
Adjusting the handlebars
By pulling the handlebar upwards or pushing the handlebar downwards, you can now adjust the handlebar position that suits you best.
Loosening wear
Sometimes the handlebars cannot be moved immediately, in which case a small tap on the handlebar head helps to loosen possible wear.
Tighten the screw
Once you have adjusted the handlebars to the correct position, you can tighten the screw again. Also check whether the handlebars are aligned straight.
Place the protective cap
Now you can place the protective cap back on the screw.


Recent Comments