Bikepacking: How to plan your bike tour!
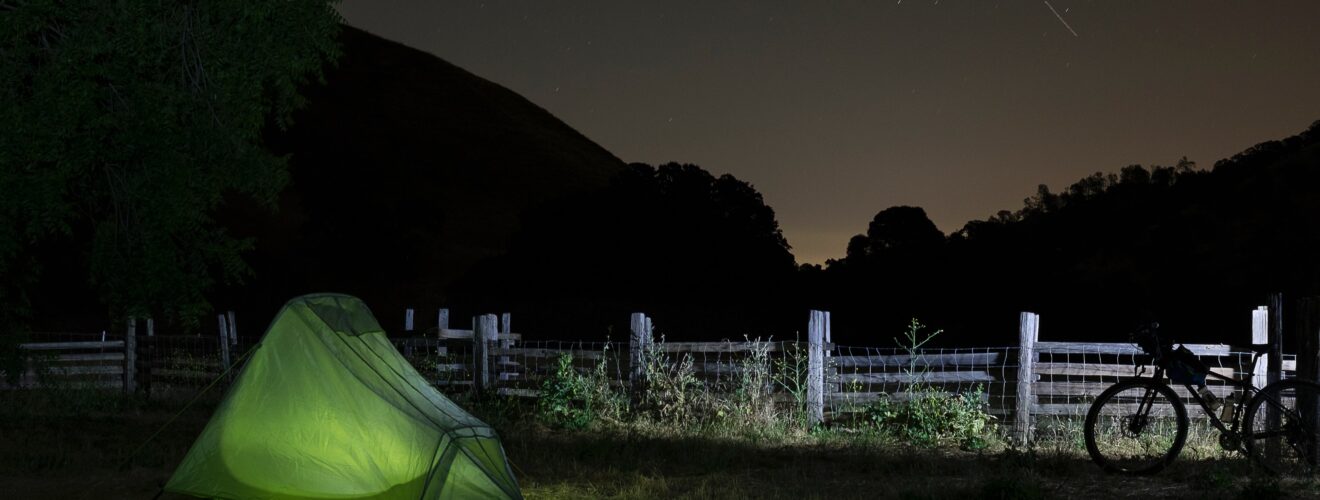
Being outdoors, enjoying nature and spending the night under the stars – that’s how we imagine a free weekend. If you like hiking, you should also try “bikepacking”. It’s best to pack light, take only the absolute essentials and concentrate on the essentials – freedom.
When long-distance hiking, you have to be careful not to carry too much. The handles of the toothbrush are shortened to save a few grams, or wet wipes are dried and later moistened with water again. What counts for hiking can also be applied to a multi-day tour by bike.
What do I need to go bikepacking?
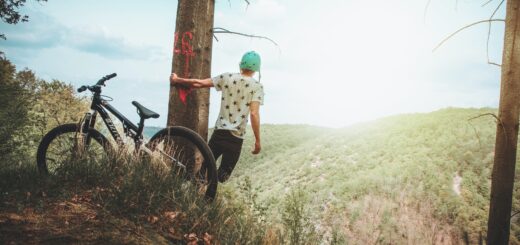
Basically, all you need is a bike and a backpack and the urge to go out. Of course, we can also tweak it a bit and make it more comfortable for us. Choose a bike that you feel comfortable with and that is technically in good condition. The type of terrain you will be riding on often determines the choice of bike and influences the planning of the tour. Don’t take on too much at the beginning and test your equipment on a short trip. Afterwards you will quickly notice what you can still optimise or which piece of equipment still needs to come along or can stay at home.
On longer tours, always take the right tools and spare parts with you so that the tour is over halfway through. Simply put together your own kit: accessories such as multi-tools, spare inner tube, repair kit, air pump, tyre levers, cable ties and adhesive tape, etc.
The classic long-distance hiker needs approx. 35 – 40 l capacity. And that includes everything! Tent, sleeping bag, kitchen, food, water and toiletries. If you weigh up to 5 kg basic weight (i.e. without water, food and fuel), you are considered an ultralight hiker.
Bikepacking has a distinct advantage: the weight can be better distributed on the bike, and a few grams or so don’t matter much to most tourers.
There are basically 3 categories:
- Ultralight: Reduced luggage to the absolutely necessary!
- Comfort: The one or other “luxury item” may come along!
- Luxury: Whether it’s a survival knife or a saw, everything that’s fun is allowed.
What transport options do I have when bikepacking?
Bikes with racks can carry the most luggage. Special saddle bags are available in many different designs and the most important thing is not to oversize them. They should be lightweight and waterproof.
- Saddle bags
For bikes without a rack, there are seat bags that attach to the saddle or seat post. These give you more freedom of movement and also save weight. They are available for up to 13 l of packing volume.
- Frame bags or half-frame bags
Between the top and down tube (in the frame triangle) another bag can ideally be attached. When buying, make sure that the dimensions are correct, because every frame is a little different. Up to 6 litres can be stowed here.
- Handleba bags
A practical handlebar bag offers up to 15 l of volume to stow a sleeping bag or sleeping pad, for example. The waterproof luggage roll can simply be attached to the handlebar for balanced luggage and load distribution.
With these 3 packing options you get a capacity of about 34 litres, which should be enough for a light bikepacking tour. Of course, you could also take a backpack with you, but a free back is more comfortable, especially in summer.
")
Basic equipment: The Big Three
For long-distance hikers, the tent, sleeping system (sleeping bag, sleeping pad) and backpack are the heaviest pieces of equipment. These 3 should be as light as possible.
Sleep and rest properly
Think about how much comfort you need, whether you would like to sleep under the stars, in a hammock or in a bivouac sack. There is the right piece of equipment on the market for every taste and for every weight/price category.
Sometimes, after a few days in the wilderness, the “retreat” to a hotel or accommodation is a welcome change and you appreciate the domestic luxury we surround ourselves with every day a little more than before.
Basically, your chosen outdoor accommodation should protect you from wind and weather, be light and have a small pack size. Here again, the season and the region you want to travel to play a big role. If it’s 28°C in summer, you can dramatically reduce your pack size, and if you’re touring in winter, you’ll need to carry a lot more to keep warm in camp.
")
When it comes to sleeping mats or sleeping pads, you can choose between an inflatable or a foam mat. Inflatables have a higher “R-value” (thermal resistance) and are suitable for colder days. They are also very comfortable and lightweight. With this type of sleeping pad, you should always be very careful that there are no sharp objects such as stones, roots, etc. between the mat and the ground, otherwise the sleeping comfort will soon be gone. On the other hand, you have a small pack size (the size of a coffee cup) and the lightest inflatable pad weighs about 255 g with an R-value of 2.3 (insulates to 2°C).
Foam mats, on the other hand, are rather bulky and have a lower R-value. If you want to save money and can do without a little comfort, a rigid foam pad is the best choice. The weight of a 183 x 51 mat is approx. 410 g with an R-value of 2.6.
Which R-value is right for me?
- 1.0 – 1.5: up to +7 °C – summer
- 1.5 – 2.5: up to +2 °C – spring and autumn
- 2.5 – 3.5: down to -5 °C – 3 seasons
- 3.5 – 4.5: to -11 °C – All seasons
- 4.5 – 5.5: to -17 °C – Winter
The choice of sleeping bag depends on the weight and comfort temperature. Before a tour you should keep a close eye on the weather and plan accordingly. Everyone has a different feeling for cold or warmth and it often depends on the clothing worn in the sleeping bag. The shape of the sleeping bag is also decisive. If you are more likely to freeze, you should choose a mummy sleeping bag, which fits close to your body so that less air needs to be heated. If you are camping occasionally in the summer, you should choose a rectangular sleeping bag, which you can turn into a blanket if you get too warm or if you are travelling with your partner to keep each other warm.
Which sleeping bag is right for bikepacking?
Down sleeping bags are the lightest and have a very small pack size with the same warmth. Many sleeping bags are filled with synthetic fibres which are a lot heavier. The big advantage of a synthetic fibre sleeping bag is that it hardly absorbs any moisture and once wet, it continues to keep you warm and dries quickly.Once the down filling gets wet, it usually loses its thermal performance and can clump together, so in regions with high humidity and when touring in winter, many people opt for a synthetic fibre sleeping bag.
Comfort temperatures:
- Winter sleeping bags: -5 °C to -18 °C
- 3-season sleeping bag: from + 10 °C

Cooking on the road: the bikepacking kitchen
From titanium pots to ultra-light camping cookers – there is an almost endless range on the market. When buying, look for a small pack size, weight and universal applicability. Often all you need is a way to heat water to pour over your trekking meals. You will rarely cook extensively on a multi-day tour.
Opinions differ among long-distance hikers. Some absolutely need warm water for their coffee in the morning, others “coldsoak”. This means soaking the desired food without heating it. Coldsoakers, and especially thru-hikers in America, are often concerned with efficiency and saving weight, which is why some even do without a cooker altogether.
Which cooker is the right one?
Gas cooker:

Do you like to cook with gas? Then you need gas cartridges, e.g. from Primus Power Gas, filled with butane, isobutane and propane. These gas cartridges weigh approx. 100g and a suitable burner. The lightest, cheapest and smallest canister stove on the market is the one from the brand BRS. It weighs only 25g and has a gas consumption of 140g/h (combustion power: 2700 W). A gas cartridge fits into a titanium cooking pot together with the burner and can thus be transported in a space-saving way. On long trips, however, it can be difficult to find suitable gas cartridges. Especially in remote regions, it will be almost impossible to find any. Precise planning is advisable here, as well as sending supplier packages to selected locations.
Spirit cooker:

The fuel for spirit cookers is ethanol (alcohol). Methylated spirits are available almost everywhere in DIY shops, household shops or supermarkets. These cookers are cheap and require no maintenance. Consumption: for two hot meals and one hot drink a day for two people, you need about one litre of methylated spirits a week. A well-known brand is for example Trangia (weight: 110 g). The lightest spirit burner weighs around 31 g (without lid and cap). The fuel is carried in a foldable container or in a simple plastic bottle to save weight.
Hobo cooker or wood carburettor

A hobo is a portable fireplace. Wood can be found almost everywhere to fire the cooker with. However, this is not allowed everywhere. A rustic way of making a fire with a warming effect. With a little preparation time, cooking can be done effectively without having to carry fuel. A Hobo made of titanium weighs about 290 g
What to eat on a bikepacking tour?
On a long, strenuous tour, food is mainly about keeping weight down and calories up. The calorie requirement often rises to several thousand kilocalories per day. Many choose nutrient-rich and dehydrated trekking food designed for high energy consumption (approx. 7 EUR/serving). If this is too expensive, you can put together your own meals and dehydrate them. Homemade meals then only cost 1-2 EUR/serving. Then just pour heated water over the dish on the trail and after about 5-10 min the meal is ready. In addition, snacks such as nuts, dried fruit and snack bars provide a good energy balance.
")
How do I stay hydrated while bikepacking?
Daily fluid intake is often underestimated. The human body needs about 2.5 litres a day. Even more during strenuous activity. We can manage without water for about 3-4 days, but after that it becomes critical. The transport of water is a big weight factor in backpacking. Possibilities to refill water should therefore be planned exactly in a tour. Springs, streams or wells are not always available or the water is not immediately drinkable. There are many options to make water drinkable. Water filters, water purification tablets and then you could boil the water before drinking it to make it drinkable.
Where do I attach my water bottles to my bike? Water transport!
By default, the water bottles are fixed in the frame triangle. If the bike is already equipped with different bags, this can lead to a problem. Bottle cage and frame pack do not always fit together. If you want to transport the bottles in the frame triangle, you should pay close attention to the dimensions so that both are compatible. With a half-frame bag and 2 mounted bottle holders you get 2 x 0,75 l. There are many different holders and possibilities and sometimes you have to tinker a little. Whether you mount them in the frame triangle, on the seat post or on the fork, you have to decide individually and depending on the model.
Bikepacking with an e-bike
Depending on the model, e-bikes are ideal companions for long and hilly tours. The only limitations are if there are no power sources available for charging on long stages or if a bulky battery minimises the space available for attaching bags. Depending on the mode, up to 80 km can be achieved with one battery charge. If you still want to cover longer distances, you can opt for an additional battery. This can be carried in the luggage or mounted on the bike, thus doubling the range of your e-bike. It is also a good idea to carry a quick charger with you, with which you can charge the battery in approx. 3 hours.
E-bike charging stations & battery ranges
There are now many e-bike charging stations in Germany, Austria and Switzerland where you can recharge your bike. These stations are increasingly found at petrol stations, restaurants, museums, town halls and public places. There you can then comfortably charge your bike and in the meantime explore the area.
Bosch battery charging times at a glance:
- PowerPack 300: approx. 2.5 hours
- PowerPack and PowerTube 400: approx. 2.5 hours
- PowerPack and PowerTube 500: approx. 3 hours
- PowerTube 625: approx. 3.7 hours
Related articles:
 Camping trailer for bike
 Winter cycling or bad weather: What to watch out for
 Which handlebar is the right one for me?
 What frame materials are available?
 Bike reflectors guide – Stay visible and safe on the road
 Bike mudguards – What they do and which type to choose
 How do I calculate the optimum frame height?
 How to choose the right child bike seat


Recent Comments