How do I find the right road bike handlebars?
Reach, drop, rise, backsweep and flare are different units that affect the riding feel, comfort and seating position. You can find out what they mean in detail here.
In the past, you didn’t have to worry about these technical terms because you only had a standard. In 1930, the UCI (Union Cycliste International) specified exactly what a road bike should look like. At that time, a handlebar was pushed through the stem during assembly because the clamp could not be opened completely. In the meantime, a lot has happened in the development of the drop bar, especially in the aero, endurance and gravel sectors.
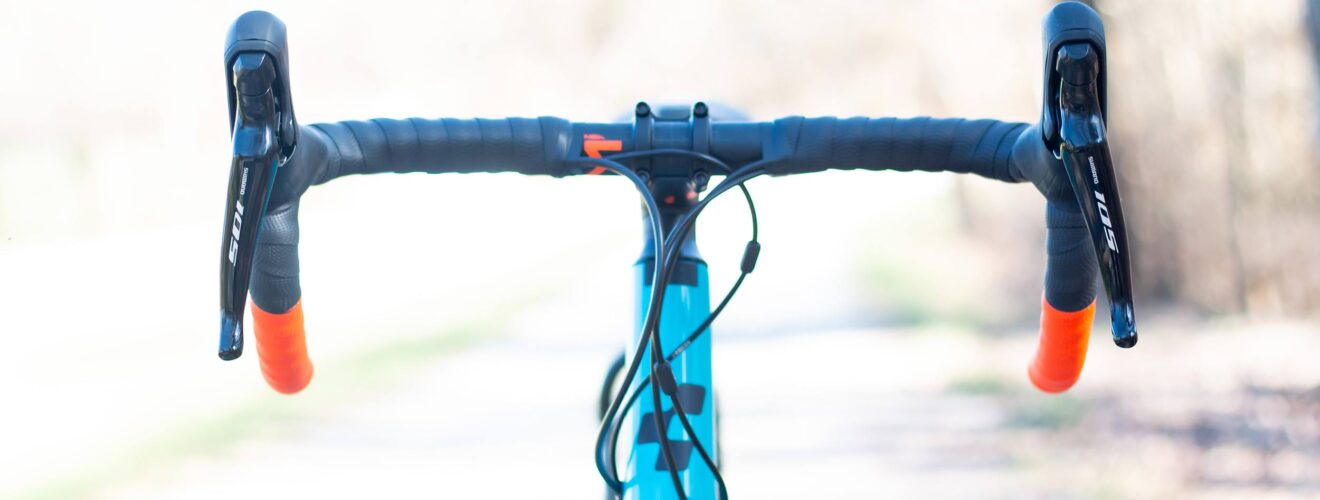
All road bike handlebars have one thing in common: they have a handlebar that curves downwards to allow flexible grip positions while riding. This can prevent pressure points as well as muscle strain.
Handlebar width:
Common widths are 400 to 460 mm (from the centre of the handlebar to the centre of the drop). To determine an ideal handlebar width, measure your own shoulder distance from joint to joint. In the past, the following basic rule was used: handlebar horns should be about the same width apart as the shoulders. With aero bikes, the handlebars are a little narrower in order to stand better in the wind. On rough tracks and gravel bikes, wider handlebars are better for improved control.
Backsweep (cranking of the handlebars):
A handlebar that is slightly bent backwards towards the saddle has a backsweep. On road bikes this is only slightly pronounced. It can be more comfortable for some wrists.
Flare:
If the lower handlebar is flared wider than the upper handlebar, this is called a “drop flare”. The margin ranges from a few millimetres to several centimetres. A wider flair offers more control on bumpy passages and is more ergonomic. A sloping lower link is called a “flare out”. This supports a more natural wrist position.
Reach (handlebar depth):
Reach on road bike handlebars is the forward bend from the centre of the top bar to the foremost point of the bend. The pre-bend determines the position of the shifting brake lever unit and determines how stretched the posture is on the road bike. The reach can be compensated for by the stem length.
Drop (handlebar height):
Drop is the perpendicular measurement from the upper to the lower handlebars, measured between the centres of the tubes. The more drop, the lower you sit on the bike. A high drop saves power in the wind and lets you really pick up speed.
Rise:
A small upward offset from the clamping point on the stem is called a rise. This offset makes the riding position a little more upright and comfortable, but is less streamlined.
Hand rest area:
Most road bike handlebars are simply round. If you want to combine aerodynamics with comfort, you tend to go for handlebars with a wider and flattened contact surface on the top bar. Ergonomic handlebars use a higher and shorter cross-section.
Handlebar position:
Last but not least, the installation of the handlebars as well as the positioning of the brake levers is also very individual. In any case, bending of the wrists should be avoided. If you are not sure, you can initially set a neutral, central alignment (markings on the handlebars). Also make sure that the brake levers have a straight transition to the handlebars. From this position, you can then readjust step by step.
Conclusion:
There are many ways to influence the seating position on a road bike. However, it is difficult to say in general which position is best. Trial and error is recommended. Finding the right handlebars can take a little time – but it is worth it. Often special bikes (aero, endurance or gravel) are already equipped with ideal components for the respective area of use. All that’s missing is the fine tuning
Related articles:
 Cube Attain C:62 SLT – Roadbike magazine test winner
 Which road bike tyre is best for you?
 Racing bike aerodynamics
 Road Bike Beginner’s Guide
 What is the correct torque (Nm) for bike screws?
 Custom Trek Madone 7 Disc eTab Aero Road Bike (Project One)
 How to change bike pedals: Your comprehensive step-by-step guide
 Road Bike groupsets: comparison between Shimano and SRAM


Recent Comments